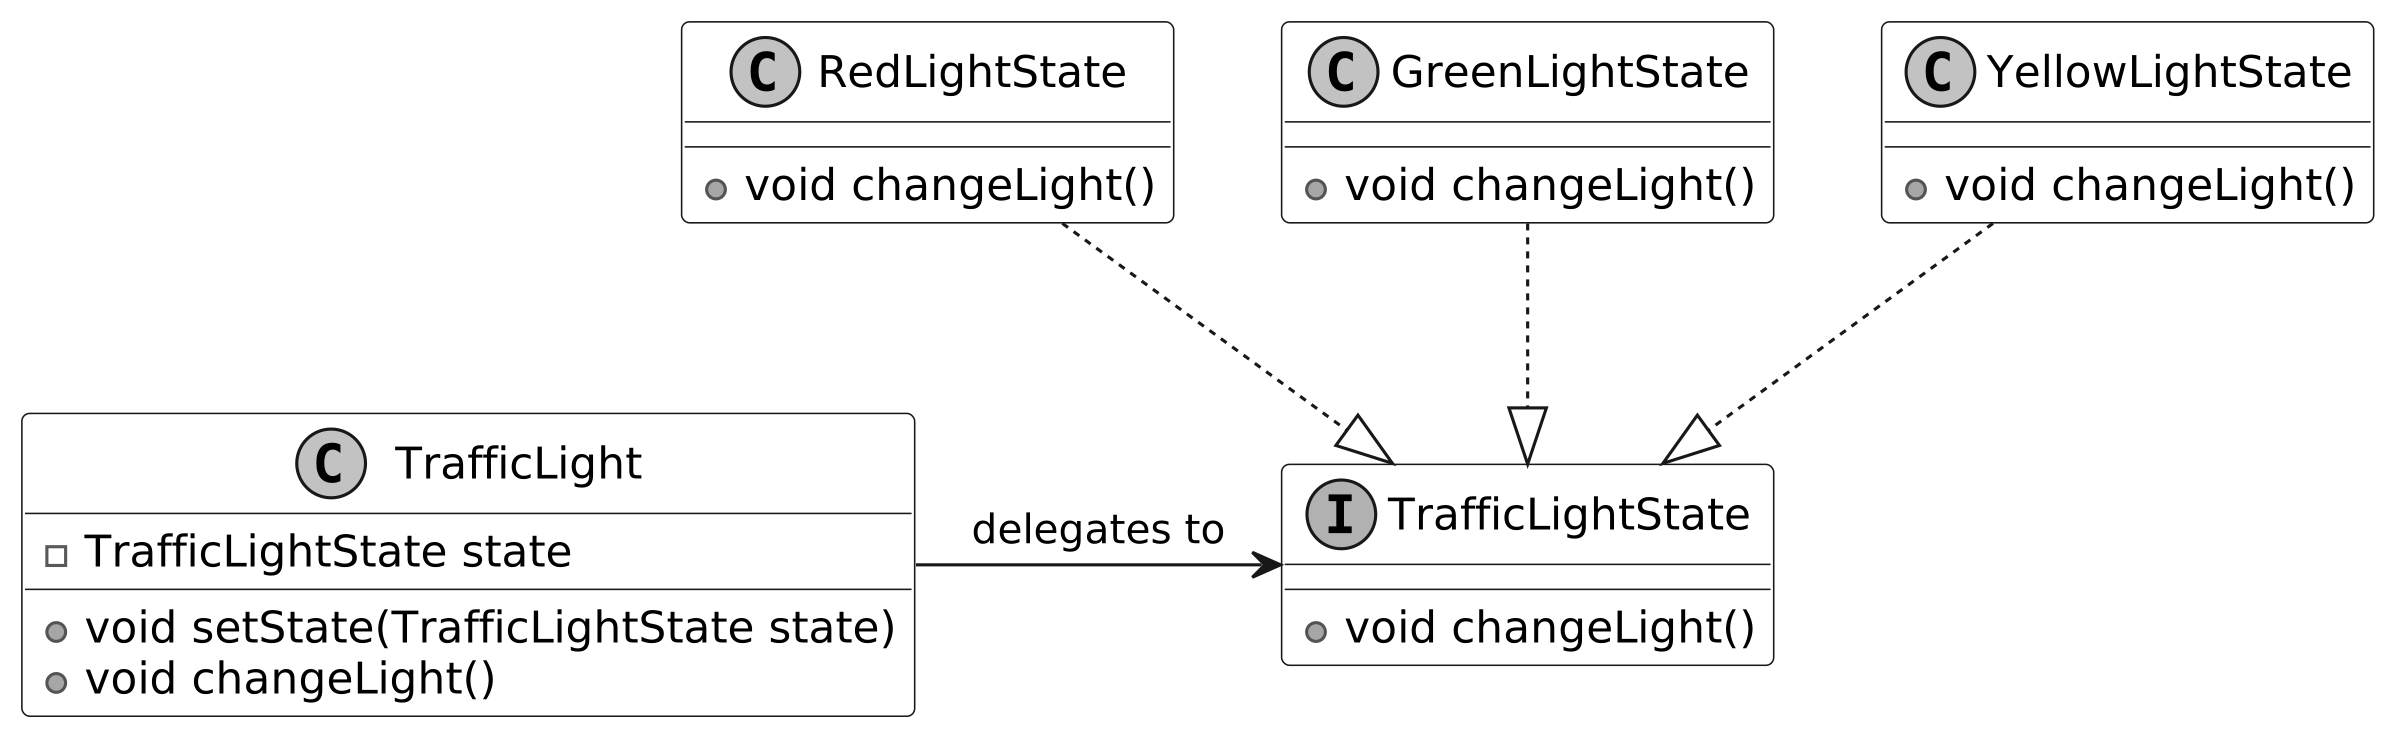
本章探討**自動販賣機(Vending Machine)**系統的設計:使用者選購商品、分發商品、管理庫存、處理付款。雖然真實機器涉及硬體(投幣口、讀卡機、觸控螢幕),但本章將聚焦於系統的狀態、資料與核心功能。
需求蒐集#
題目情境#
想像你站在販賣機前想買零食。投入現金、選擇商品,幾秒後商品掉到取物口;機器還會找零。背景中,系統正流暢追蹤庫存、處理付款、確保運作順暢。請設計這樣一台販賣機。
需求釐清對話#
Candidate:是否支援多種商品類型?
Interviewer:是的,零食、飲料皆可。
Candidate:商品如何組織?我假設每個商品需有獨一識別碼與價格。
Interviewer:商品放在特定貨架(rack)上,每個貨架只放一種商品。每個商品有獨一的 product code 與價格。
Candidate:付款如何處理?
Interviewer:只接受現金,必要時找零。
Candidate:商品缺貨時怎麼處理?
Interviewer:系統應檢查可用性,缺貨時顯示錯誤訊息。
Candidate:若使用者投入金額不足,可以繼續加幣嗎?
Interviewer:本題假設使用者一次投入足額。若不足則退錢並顯示錯誤。
Candidate:是否有存取控制?
Interviewer:使用者與管理員權限不同。使用者可選購;管理員負責新增/移除商品。
Candidate:是否有庫存追蹤需求?
Interviewer:是。販賣機需追蹤庫存,且僅管理員可新增/移除商品。
需求整理#
功能性需求#
- 商品選擇:使用者可從一組商品中選購,每個商品有獨一的 product code、描述與價格
- 庫存管理:商品儲存在特定貨架中,系統追蹤每個貨架的庫存量
- 付款處理:僅接受現金,必要時可計算找零
非功能性需求#
- 使用者介面必須直觀,最少指令即可完成購買
- 系統必須防止未授權存取,確保僅管理員可變更商品,並安全處理現金交易
Use Case Diagram#
Use case diagram 描繪不同 actor(使用者或系統)如何與販賣機互動以達成目標。
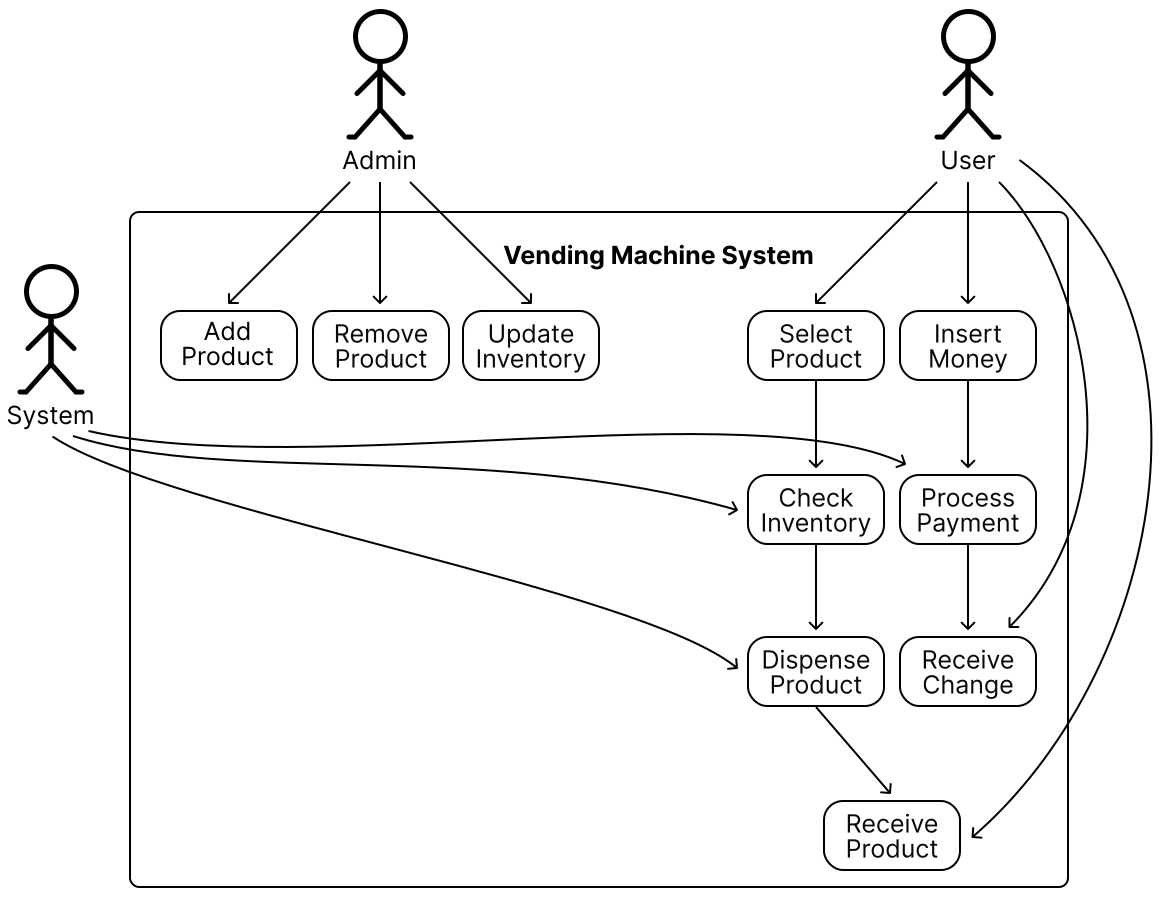
User actor 的 use cases#
- Insert Money:投入現金啟動購買
- Select Product:輸入 product code 選擇商品
- Receive Product:收取分發的商品
- Receive Change:收取找零
Admin actor 的 use cases#
- Add Product:新增商品
- Remove Product:移除商品
- Update Inventory:更新貨架庫存
System actor 的 use cases#
- Process Payment:驗證現金並計算找零
- Dispense Product:從合適貨架釋出商品
- Check Inventory:分發前確認可用性
- Display Message:向使用者顯示訊息或錯誤
辨識核心物件#
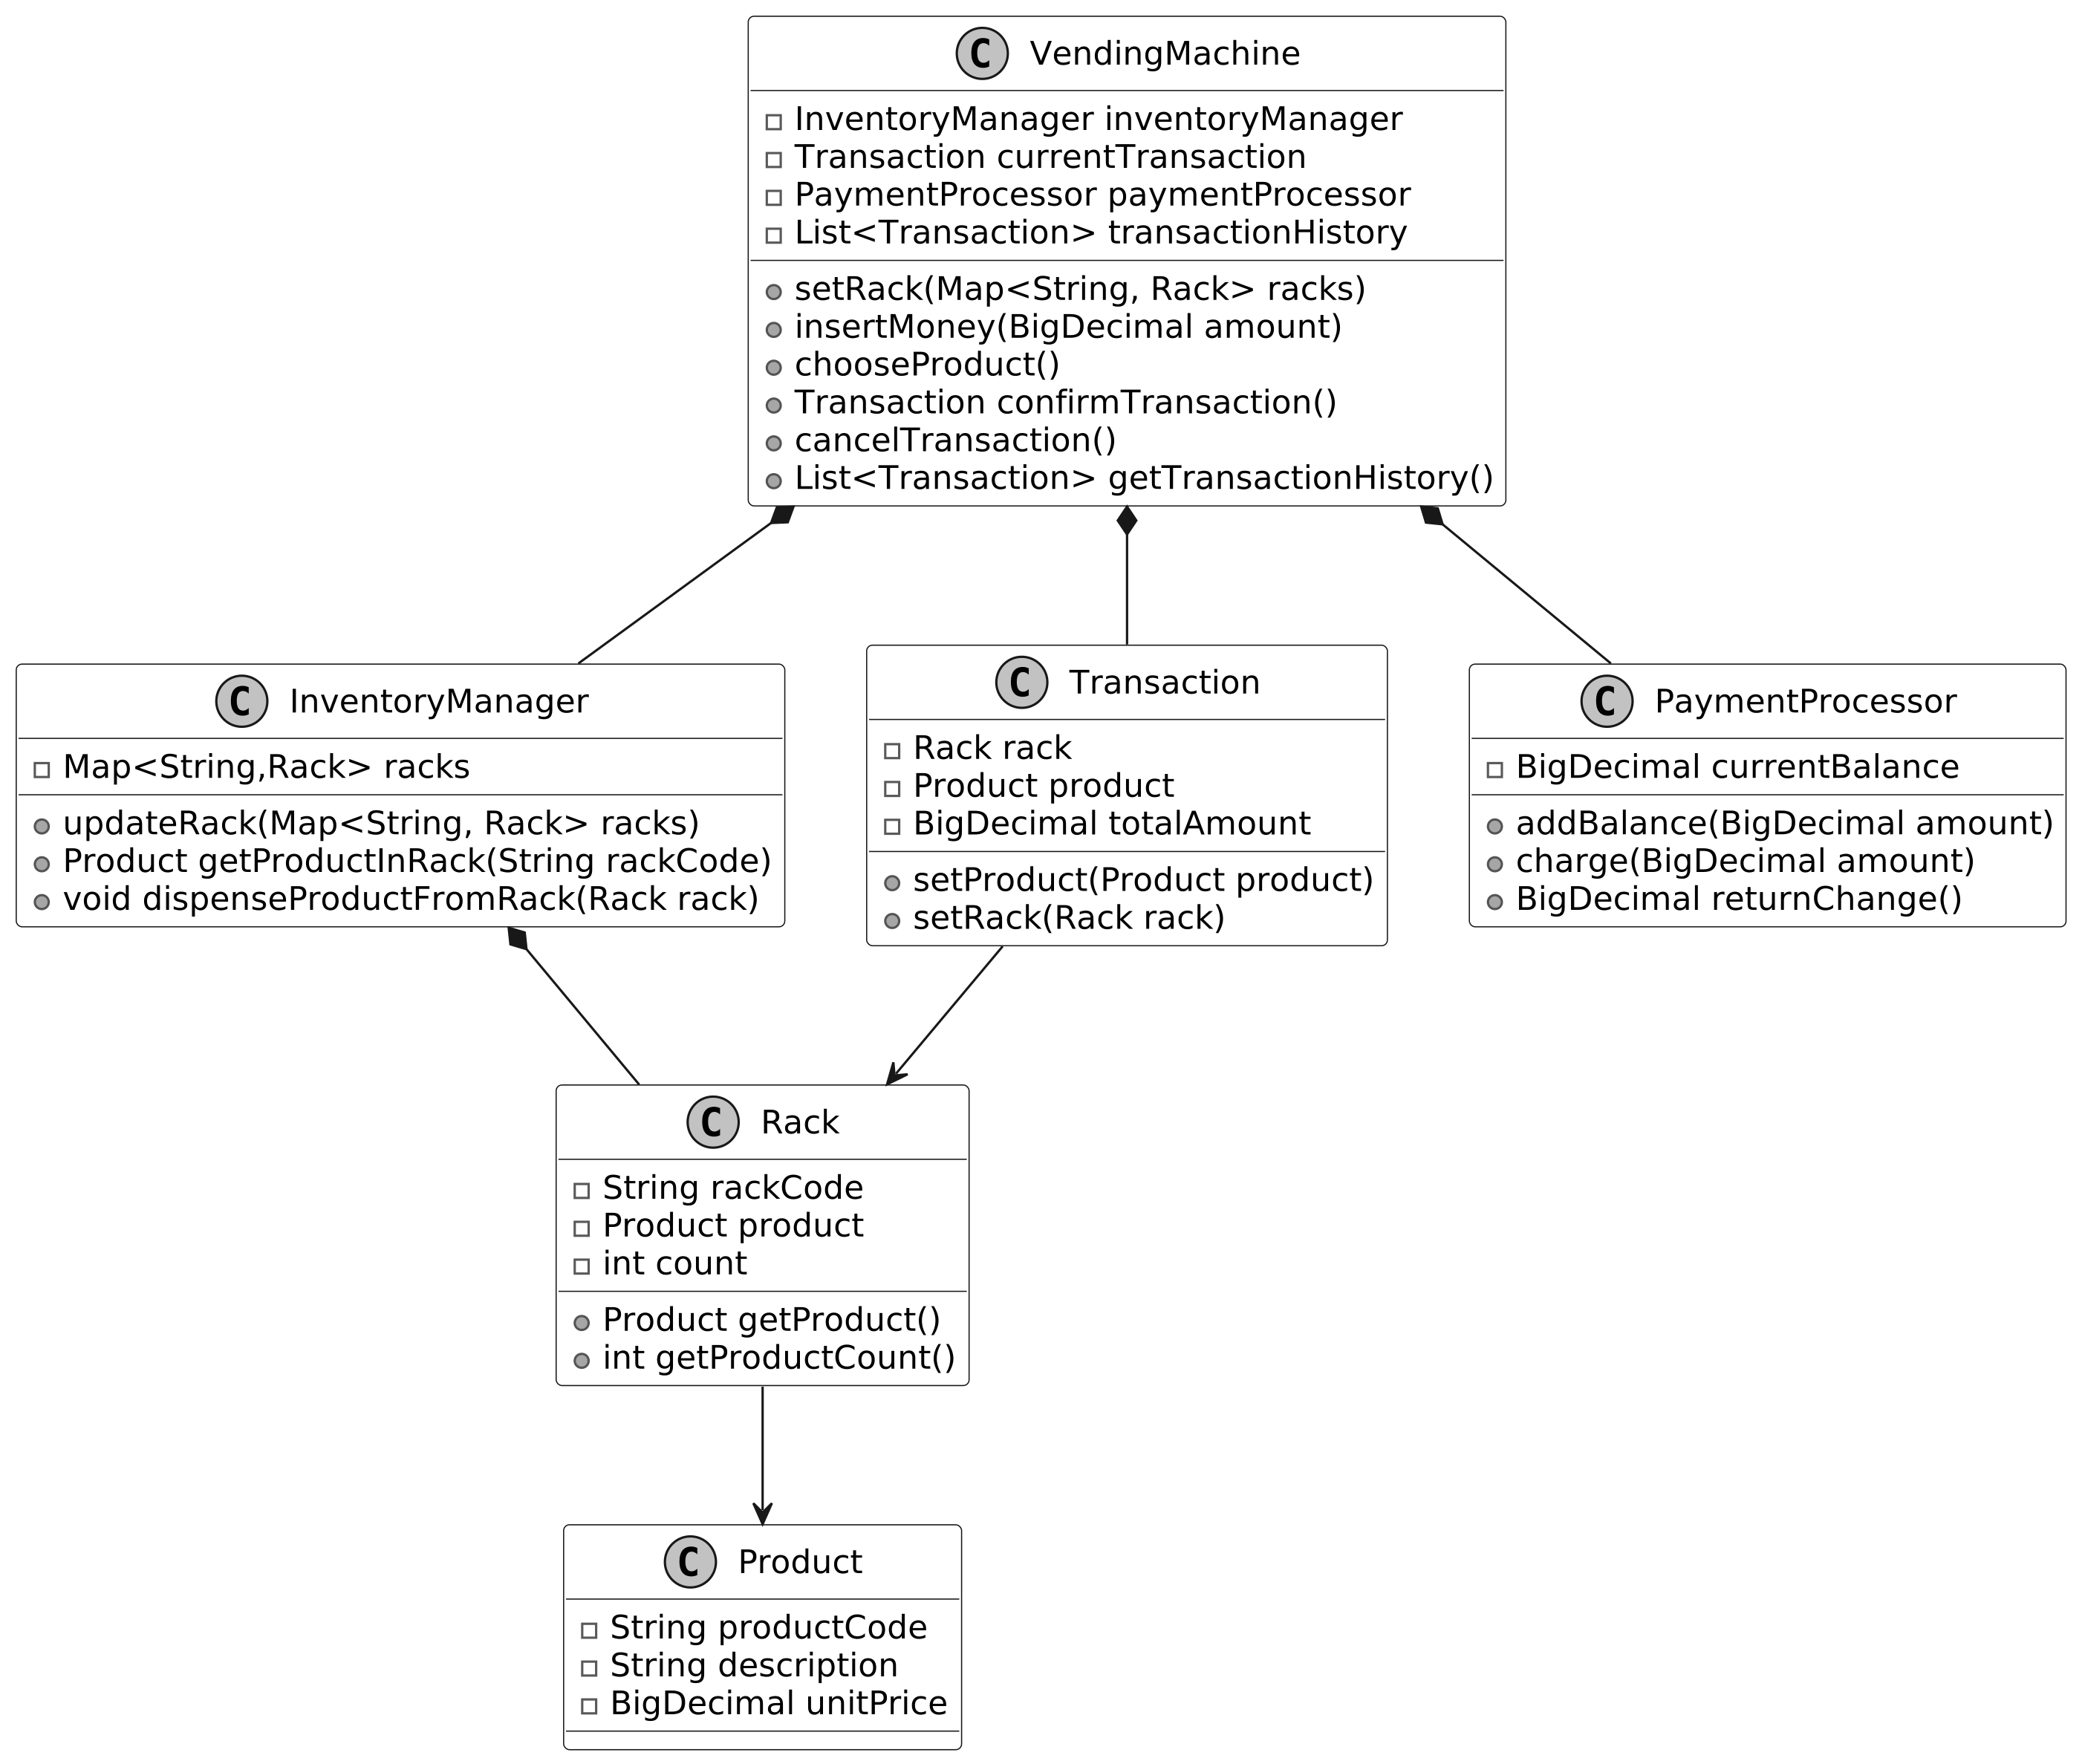
- VendingMachine:協調販賣機運作的中心實體,作為使用者互動的主要入口。我們會透過 Facade 設計模式適當委派職責,避免淪為「god object」反模式
- Product:販賣機中的商品,包含 ID、價格、描述等屬性。Product 連結到其所在的 Rack
- Rack:販賣機中指定的貨架槽位,存放單一商品類型的多個單位,並包含釋出商品的硬體機制
Design Choice:Product 連結 Rack 而非反向,因為 Rack 代表物理儲存位置;Product 是靜態實體,不應管理自身儲存。這符合單一職責原則。
- InventoryManager:追蹤販賣機內的庫存
- PaymentProcessor:處理付款、追蹤餘額並計算找零
類別圖設計#
Product#
Product 類別代表販賣機內的單一商品,包含 product code、描述與價格。
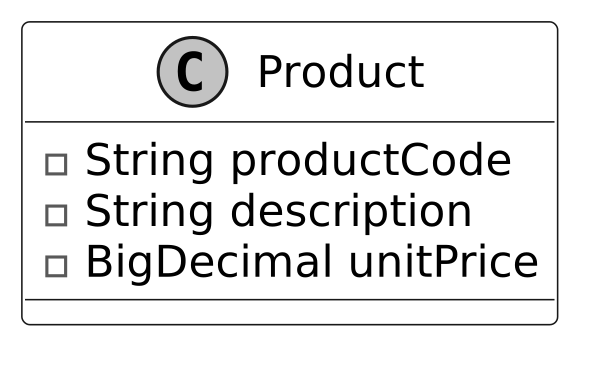
Design Choice:Product 不包含庫存量。Product 封裝固有屬性(code、description、price),而貨架庫存量會持續變動。我們以獨立的 InventoryManager 管理庫存,符合單一職責原則。
Rack#
每個 Rack 對應單一 Product,可放多個單位。多個 Rack 透過**組合(composition)**形成販賣機的庫存空間。
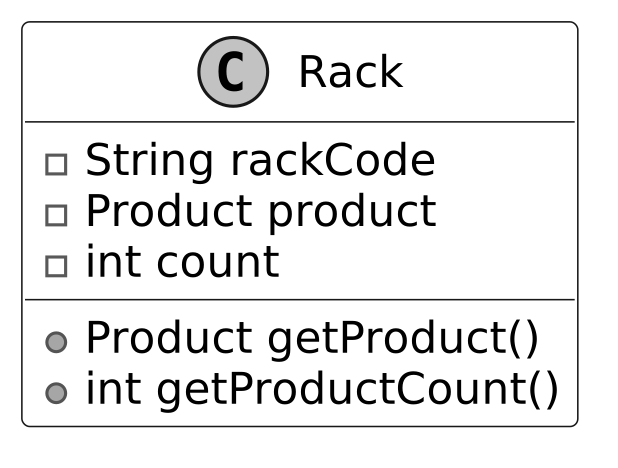
Design Choice:Rack 不包含
dispenseProductFromRack等方法。Rack 專注於庫存與商品資訊,分發動作委派給更高層的 InventoryManager,符合單一職責原則。
InventoryManager#
InventoryManager 處理商品的追蹤與儲存,支援新增、移除、分發等操作,並與硬體機制介接。
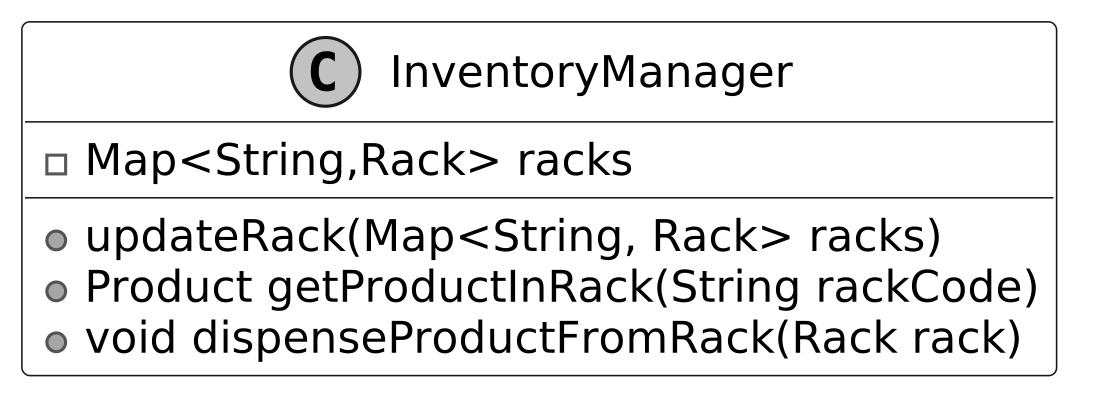
關鍵方法:
dispenseProductFromRack:執行從貨架分發商品並遞減庫存。注意命名要避免歧義——「get」前綴僅保留給回傳屬性的 getterupdateRack:允許管理員編輯整個貨架配置
Design Choice:管理 InventoryManager 內的貨架集合時,需在彈性與控制之間取捨。
updateRack(Map racks)適合大量更新;多數情況偏好addRack(Rack rack)、removeRack(Rack rack)等粒度方法。為提升安全性,可考慮 immutable collection 或 defensive copy。
PaymentProcessor#
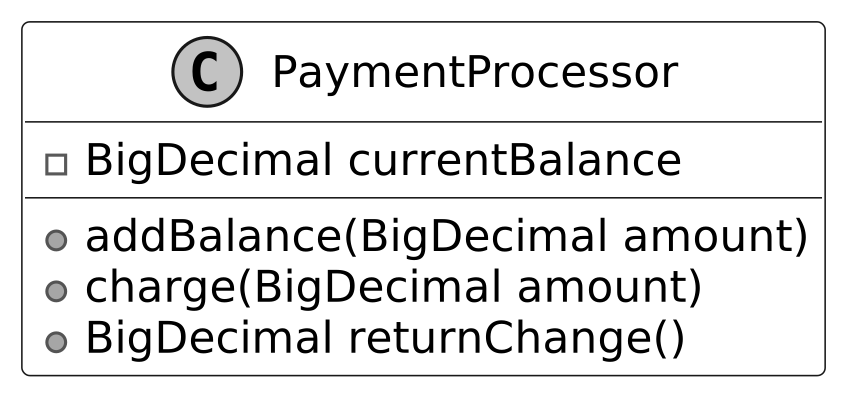
PaymentProcessor 管理付款接受、追蹤目前餘額並回傳找零。
Transaction#
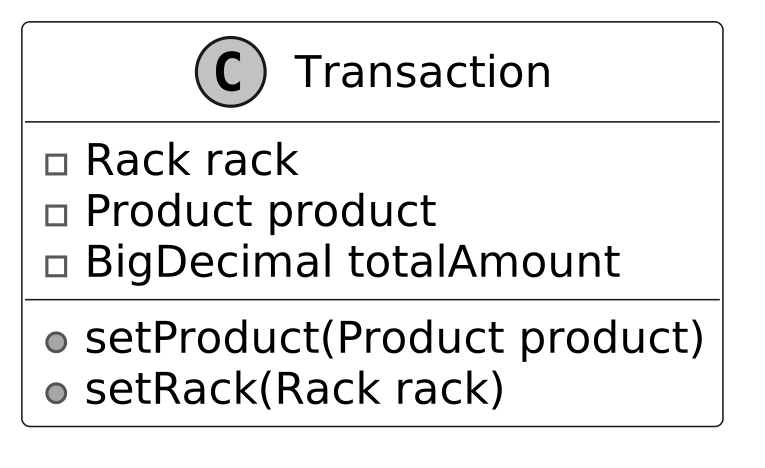
販賣機購買流程涉及商品選擇、付款、確認等多步驟。Transaction 類別作為資料結構追蹤目前購買狀態。
優點:
- 封裝關鍵細節:選擇的商品、所在 rack、所需總金額
- 追蹤進行中的交易:在最終完成或取消前維持結構化紀錄
- 協調各元件:PaymentProcessor 負責扣款、InventoryManager 負責分發、Transaction 把所有細節集中
VendingMachine#
VendingMachine 是系統核心元件,模擬販賣機行為、處理付款並管理庫存。
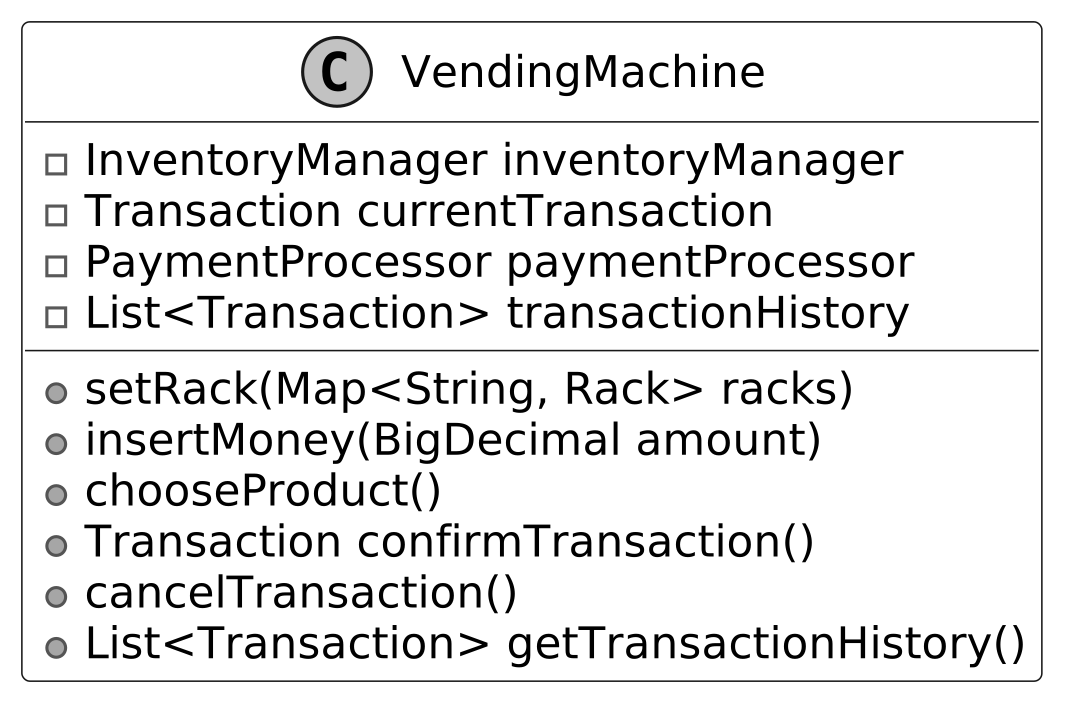
設計模式:VendingMachine 使用 Facade 模式為客戶端提供單一介面。「客戶端」指的是販賣機的軟體或硬體介面,而非個別使用者。
Design Choice:為避免 VendingMachine 淪為 god object,facade 應保持輕量並把任務委派給遵循單一職責原則的其他類別。例如商品管理委派給 InventoryManager、付款處理委派給 PaymentProcessor。
完整類別圖#
程式實作#
Product#
class Product {
    final String productCode;
    final String description;
    final BigDecimal unitPrice;

    public Product(String productCode, String description, BigDecimal unitPrice) {
        this.productCode = productCode;
        this.description = description;
        this.unitPrice = unitPrice;
    }
}
Implementation Choice:
- 金額用
BigDecimal確保精度與捨入控制- 面試時為節省時間,亦可用 integer 表示最小單位(如美分)
- 絕不要用
float或double表示金額,會引入精度錯誤- 識別碼如
productCode用 string 而非數值型別,因多半執行字串操作而非運算
InventoryManager 與 Rack#
兩個類別協作管理庫存。我們用 HashMap<String, Rack> 儲存貨架,提供以 rack code 查找的 O(1) 存取。
InventoryManager#
public class InventoryManager {
    // Maps rack codes to their corresponding rack objects
    private Map<String, Rack> racks;

    public InventoryManager() {
        racks = new HashMap<>();
    }

    // Retrieves the product from a specific rack using its code
    public Product getProductInRack(String rackCode) {
        return racks.get(rackCode).getProduct();
    }

    // Dispenses a product from the specified rack and decrements its count
    public void dispenseProductFromRack(Rack rack) {
        if (rack.getProductCount() > 0) {
            rack.setCount(rack.getProductCount() - 1);
        } else {
            throw new IllegalStateException("Cannot dispense product. Rack is empty.");
        }
    }

    public void updateRack(Map<String, Rack> racks) {
        this.racks = racks;
    }

    public Rack getRack(String name) {
        return racks.get(name);
    }
}Rack#
public class Rack {
    private final String rackCode;
    private final Product product;
    private int count;

    public Rack(final String rackCode, final Product product, final int count) {
        this.rackCode = rackCode;
        this.product = product;
        this.count = count;
    }

    public Product getProduct() {
        return product;
    }

    public int getProductCount() {
        return count;
    }
}PaymentProcessor#
public class PaymentProcessor {
    // Tracks the current balance in the payment processor
    private BigDecimal currentBalance = BigDecimal.ZERO;

    // Adds the specified amount to the current balance
    public void addBalance(BigDecimal amount) {
        currentBalance = currentBalance.add(amount);
    }

    // Deducts the specified amount from the current balance
    public void charge(BigDecimal amount) {
        currentBalance = currentBalance.subtract(amount);
    }

    // Returns the current balance as change and resets the balance to zero
    public BigDecimal returnChange() {
        BigDecimal change = currentBalance;
        currentBalance = BigDecimal.ZERO;
        return change;
    }

    // Returns the current balance
    public BigDecimal getCurrentBalance() {
        return currentBalance;
    }
}VendingMachine#
class VendingMachine {
    // Stores the history of all completed transactions
    private final List<Transaction> transactionHistory;
    // Manages the inventory of products in the vending machine
    private final InventoryManager inventoryManager;
    // Handles all payment-related operations
    private final PaymentProcessor paymentProcessor;

    // Tracks the current ongoing transaction
    private Transaction currentTransaction;
    // Represents the current state of the vending machine
    private VendingMachineState currentState;
    // Tracks the current balance in the machine
    private double balance;
    // Stores the currently selected product code
    private String selectedProduct;

    public VendingMachine() {
        transactionHistory = new ArrayList<>();
        currentTransaction = new Transaction();
        inventoryManager = new InventoryManager();
        paymentProcessor = new PaymentProcessor();
        this.currentState = new NoMoneyInsertedState();
        this.balance = 0.0;
        this.selectedProduct = null;
    }

    // Updates the rack configuration with new product racks
    void setRack(Map<String, Rack> rack) {
        inventoryManager.updateRack(rack);
    }

    // Adds money to the payment processor
    void insertMoney(final BigDecimal amount) {
        paymentProcessor.addBalance(amount);
    }

    // Selects a product from a specific rack
    void chooseProduct(String rackId) {
        final Product product = inventoryManager.getProductInRack(rackId);
        currentTransaction.setRack(inventoryManager.getRack(rackId));
        currentTransaction.setProduct(product);
    }

    // Processes and completes the current transaction
    Transaction confirmTransaction() throws InvalidTransactionException {
        // Step 1: Validate the transaction before processing
        validateTransaction();

        // Step 2: Charge the customer for the product
        paymentProcessor.charge(currentTransaction.getProduct().getUnitPrice());

        // Step 3: Dispense the product from the rack
        inventoryManager.dispenseProductFromRack(currentTransaction.getRack());

        // Step 4: Return the change to the customer
        currentTransaction.setTotalAmount(paymentProcessor.returnChange());

        // Step 5: Add the completed transaction to the history
        transactionHistory.add(currentTransaction);
        Transaction completedTransaction = currentTransaction;

        // Reset the current transaction for the next purchase.
        currentTransaction = new Transaction();
        return completedTransaction;
    }

    // Validates the current transaction for product availability and sufficient funds
    private void validateTransaction() throws InvalidTransactionException {
        if (currentTransaction.getProduct() == null) {
            throw new InvalidTransactionException("Invalid product selection");
        } else if (currentTransaction.getRack().getProductCount() == 0) {
            throw new InvalidTransactionException("Insufficient inventory for product.");
        } else if (paymentProcessor
                        .getCurrentBalance()
                        .compareTo(currentTransaction.getProduct().getUnitPrice())
                < 0) {
            throw new InvalidTransactionException("Insufficient fund");
        }
    }

    // Returns an unmodifiable list of all completed transactions
    public List<Transaction> getTransactionHistory() {
        return Collections.unmodifiableList(transactionHistory);
    }

    // Cancels the current transaction and returns any inserted money
    public void cancelTransaction() {
        paymentProcessor.returnChange();
        currentTransaction =
                new Transaction(); // Reset the current transaction for the next purchase.
    }

    // Returns the inventory manager instance
    public InventoryManager getInventoryManager() {
        return inventoryManager;
    }
}
購買流程方法說明:
insertMoney(BigDecimal amount)— 透過 PaymentProcessor 增加機器餘額chooseProduct()— 從 InventoryManager 取得商品與貨架,與目前 transaction 連結confirmTransaction()— 驗證、扣款、分發、更新庫存與交易歷史
深度討論#
強制任務順序#
「如何確保使用者必須先投幣才能選商品?」
販賣機常見需求是防止無效操作。我們需強制以下順序:
- 使用者必須先投入現金
- 系統檢查金額是否足夠
- 若足夠,使用者選擇商品
- 機器分發商品
此外應在每個階段提供回饋。我們可使用 State Pattern 來建模販賣機的行為。
想了解 State Pattern,請參考章末**延伸閱讀**。
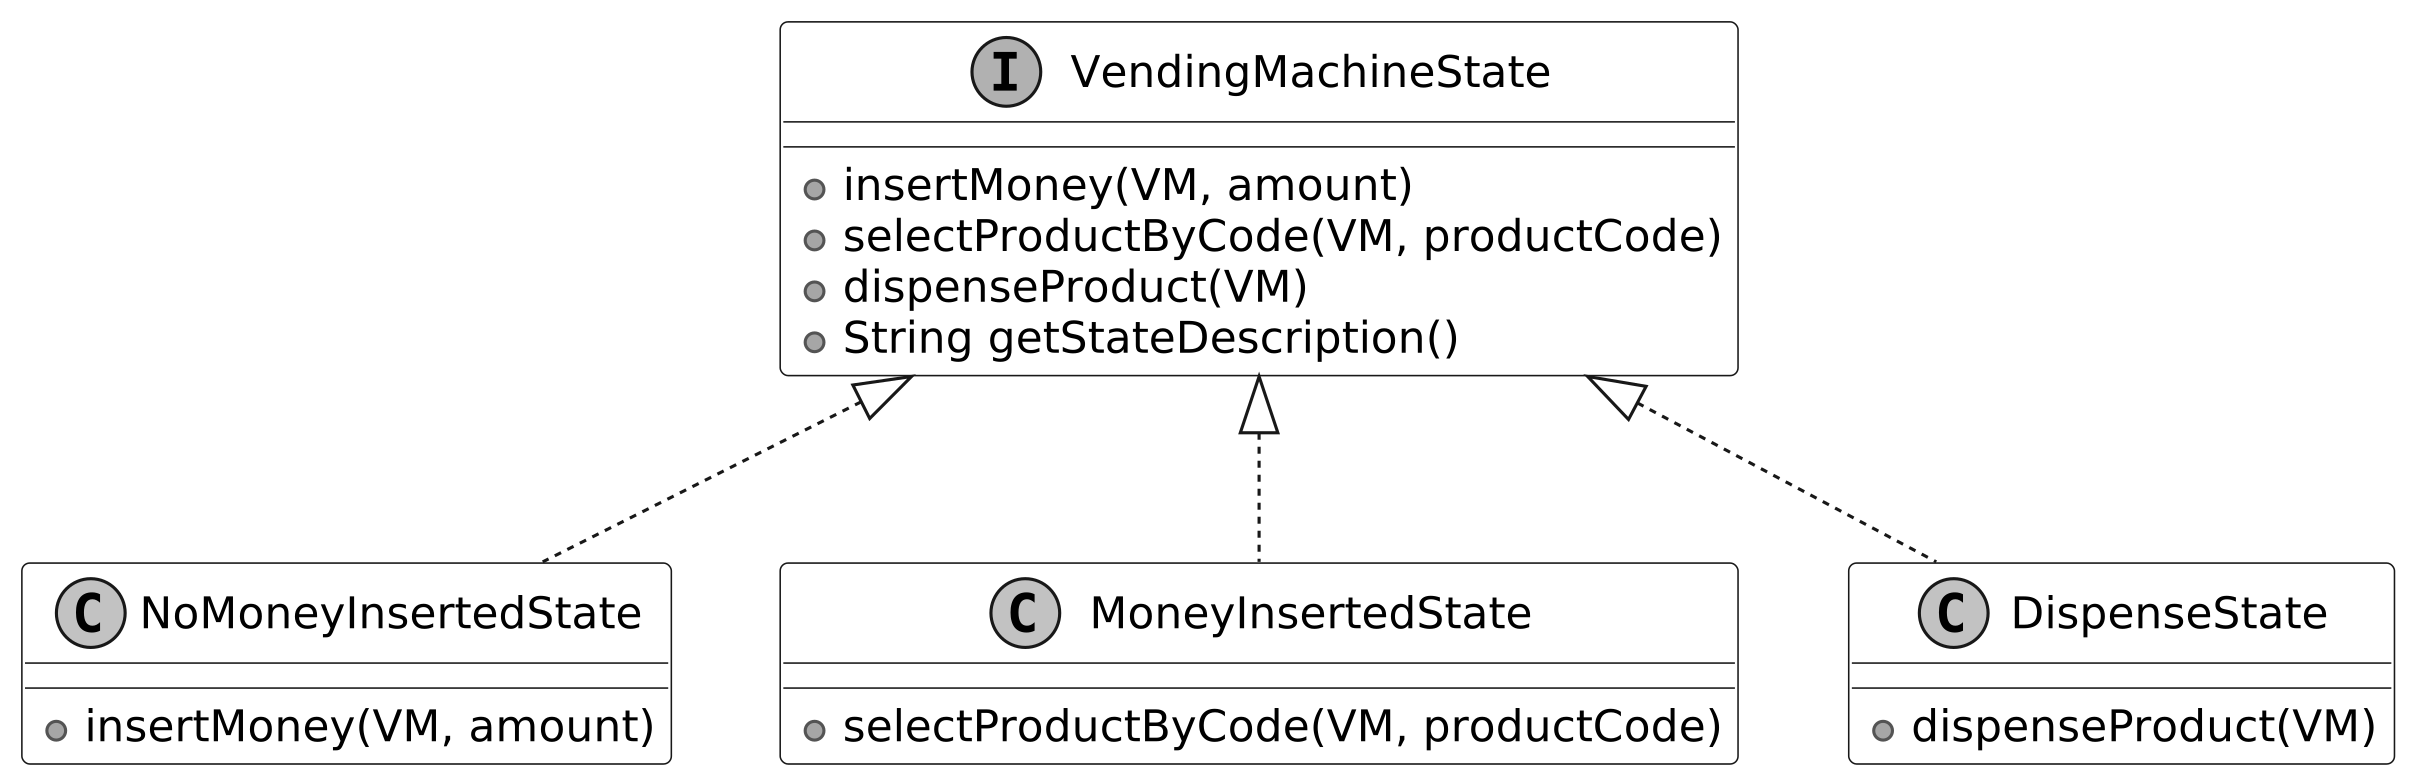
設計變更#
定義三個狀態:
NoMoneyInsertedState
- 初始狀態,尚未投幣
- 顯示「Insert money to proceed」
- 僅允許投幣;嘗試選商品會拋例外
- 成功投幣後轉為 MoneyInsertedState
MoneyInsertedState
- 已投幣
- 顯示「Select a product」
- 啟用選商品;防止額外投幣以避免溢付
- 驗證商品是否可用且金額足夠
- 成功選商品後轉為 DispenseState
DispenseState
- 準備分發商品
- 顯示「Dispensing product…」或「Please collect your change」
- 處理分發並重置回初始狀態
- 防止流程中再做其他操作
State Pattern 明確定義狀態間的轉移,確保動作依序執行:Insert Money → Select Product → Dispense Product。
程式變更#
public interface VendingMachineState {
    // Handles money insertion in the current state
    void insertMoney(VendingMachine VM, double amount);

    // Handles product selection in the current state
    void selectProductByCode(VendingMachine VM, String productCode)
            throws InvalidStateException;

    // Handles product dispensing in the current state
    void dispenseProduct(VendingMachine VM) throws InvalidStateException;

    // Returns a description of the current state
    String getStateDescription();
}
NoMoneyInsertedState 範例:
public class NoMoneyInsertedState implements VendingMachineState {
    // Adds money to the machine and transitions to MoneyInsertedState
    @Override
    public void insertMoney(VendingMachine VM, double amount) {
        VM.addBalance(amount);
        VM.setState(new MoneyInsertedState());
    }

    // Throws exception as product selection is not allowed without money
    @Override
    public void selectProductByCode(VendingMachine VM, String productCode)
            throws InvalidStateException {
        throw new InvalidStateException("Cannot select a product without inserting money.");
    }

    // Throws exception as product dispensing is not allowed without money
    @Override
    public void dispenseProduct(VendingMachine VM) throws InvalidStateException {
        throw new InvalidStateException("Cannot dispense product without inserting money.");
    }

    // Returns a description of the current state
    @Override
    public String getStateDescription() {
        return "No Money Inserted State - Please insert money to proceed";
    }
}
為節省篇幅,省略 MoneyInsertedState 與 DispenseState 的程式碼,結構類似。
本章小結#
主要收穫:將職責切分為 Product、Rack、InventoryManager、PaymentProcessor,並透過 facade 統一對外 API。
關鍵設計決策:
- 遵循單一職責原則,每個元件聚焦特定職責
- InventoryManager 管理庫存;PaymentProcessor 處理現金與找零
- 深度討論中以 State Pattern 強制任務順序,防止「未付款即分發」等無效行為
面試中切記在實作核心功能後強調驗證與錯誤處理,特別是這類錯誤行為可能導致財務損失的系統。
延伸閱讀:State Design Pattern#
State Design Pattern#
State 模式是一種行為型設計模式,允許物件在內部狀態改變時改變其行為,看起來就像物件變成了不同的類別。
在販賣機設計中,我們以 State 模式管理 NoMoneyInsertedState、MoneyInsertedState、DispenseState,讓 VendingMachine 能在不更動核心邏輯的前提下動態切換行為。
問題情境:交通號誌#
TrafficLight 有三個狀態:Red、Yellow、Green,每個狀態行為不同:
- Red — 持續亮紅燈一段時間
- Yellow — 閃爍黃燈,提醒準備停車
- Green — 亮綠燈讓車輛通行
若用條件式實作,會帶來下列問題:
- 可擴展性:狀態增加時條件式爆炸式成長,新增狀態(如緊急車輛閃爍)需修改現有邏輯
- 可維護性:邏輯重複、易產生 bug
解法#
State 模式將每個狀態的行為封裝為獨立類別。原物件(context)持有目前狀態物件的參考,將狀態相關任務委派給該物件。
例如 TrafficLight context 可委派給 RedLightState、GreenLightState、YellowLightState。要切換狀態時,context 只需替換目前狀態物件,無需複雜條件式。